Your customers will be able to log in and see their orders.
Manage and control who will be able to log in to their account on your website.
Fully online, providing your customers the freedom they need.
1. Add the following code before the </body> tag on every page that displays
the login system (not needed on the widget & configurator page).
<script src="https://configurator.speakintelligence.com/Scripts/jquery-2.1.4.min.js"></script>
<script src="https://configurator.speakintelligence.com/Scripts/jquery-ui-1.11.2/jquery-ui.js"></script>
<script id="si_widgetJs" type="text/javascript" src="https://configurator.speakintelligence.com/Scripts/
Widget/configurator.min.js"></script>

<script>$(document).ready(function() {
configurator.init('/configurator.html?packageid=10');
});</script>
2. Replace ‘/configurator.html’ with your link to the new page, don’t remove
the apostrophes.
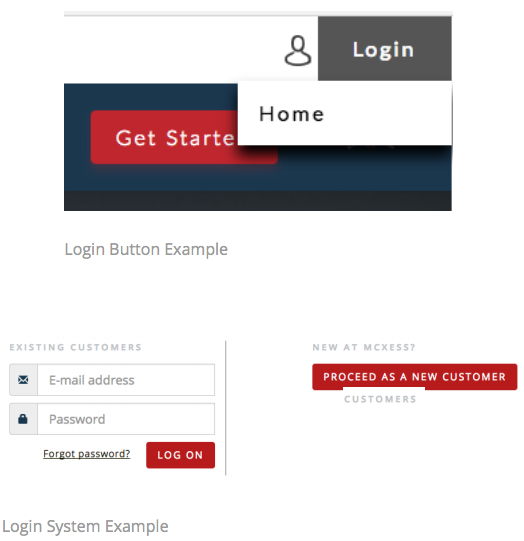
3. Copy the following code and place it on every page that displays the login system, before the </body> tag. This div will be the location of the login menu (also needed on the widget & configurator page)
<div id="si_loginWidgetContainer"></div>
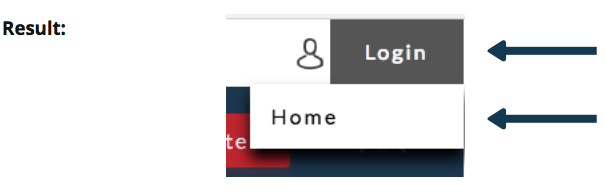
4. Changes to the style can be made with the following elements in CSS:
| ul#si_loginMenu | Login menu container |
| ul#si_loginMenu li a | List item links |
| ul#si_loginMenu li div | List item |
5. Default style will be applicable, make sure to prioritize your own CSS style.
For the default style:
https://configurator.speakintelligence.com/Content/Widget/Login/default.css
Example Code:
ul#si_loginMenu{height: 50px;min-width:100px;font-family: Lato, sans-serif;
font-weight: 300;letter-spacing: 2px;font-size: 16px;background-color: #ffffff;}
ul#si_loginMenu li a {background-color: #ffffff;}
ul#si_loginMenu li div {position:absolute;margin-left: -60px;}
Comments
0 comments
Please sign in to leave a comment.